

How to: Paint a Death Guard Bloat Drone Part 2
If you’ve not read Part 1 yet, it’s here, and it will bring you up to speed on how to get to the start of this one.
Where to start with the final part? The base. The plastic bases that Games Workshop make are pretty decent, and really easy to paint up so that they look good. For the Bloat Drone I used one of the 60mm Sector Imperialis bases, sprayed with Halfords’ Matt Black spray, then based with Vallejo Model Air Chrome. I wasn’t too careful where the Chrome went, and it doesn’t really matter too much for gaming, it’s just something for the model to stand on – I expect Mike will disagree with me.
Next I added some Vallejo Model Air Rust to a couple of pipes and the two strips at the top of the base, and some Citadel Retributor Gold and Citadel Liberator Gold to a couple of other parts. As there were a number of small cables running through the base, I painted a couple red, green and blue. I painted the Mechanicum emblem using Vallejo White and Citadel Abaddon Black. Next I washed the whole thing with Citadel Nuln Oil, and added patches of Citadel Agrax Earthshade and Citadel Seraphim Sepia.
Once the washes were dry I used Citadel Typhus Corrosion – again, use an old brush for this stuff – on the corners of the grating, and once dry, I gave these sections a light frosting of Citadel Ryza Rust. Finally, I added a few spots of Citadel Nihilakh Oxide on the Brass/Gold sections. I left it there, as I wanted the model to stand out on the base rather than the base being so intricate it makes you stare at that rather than the model.


Using the method of lens painting here, I used Vallejo Light Green and added increasing amounts of white. The main sections here were adding the base layer of Citadel Nurgling Green. I watered it down a little, as this allows you to blend it in with the Citadel Reikland Fleshshade used over the initial layer. It also leaves it looking slightly mottled, which is a bonus. Once the Nurgling Green was dry, I used Vallejo Red Shade over all the areas of infection with boils and spots, and all the tears and splits in the flesh, then went over the areas immediately surrounding the boils, spots, cuts, etc with Citadel Carroburg Crimson.
The tips of the spines, bone tubes and protrusions were painted with Citadel Ushabti Bone, then blended into the Citadel Rakarth Flesh using some watered down Ushabti Bone. The tubes beneath the Drone I painted Citadel Averland Sunset with Abaddon Black stripes, the rest were painted with the following citadel colours; Caledor Sky, Elysian Green, Fire Dragon Bright, and Mephiston Red.
All the gloopy looking bits were given two coats of Citadel Nurgle’s Rot.


Next up, I painted the ends of the cables that appeared to have the metal core poking out wutg Vallejo Model Air Copper, then washed all the coloured tubes with Agrax Earthshade.
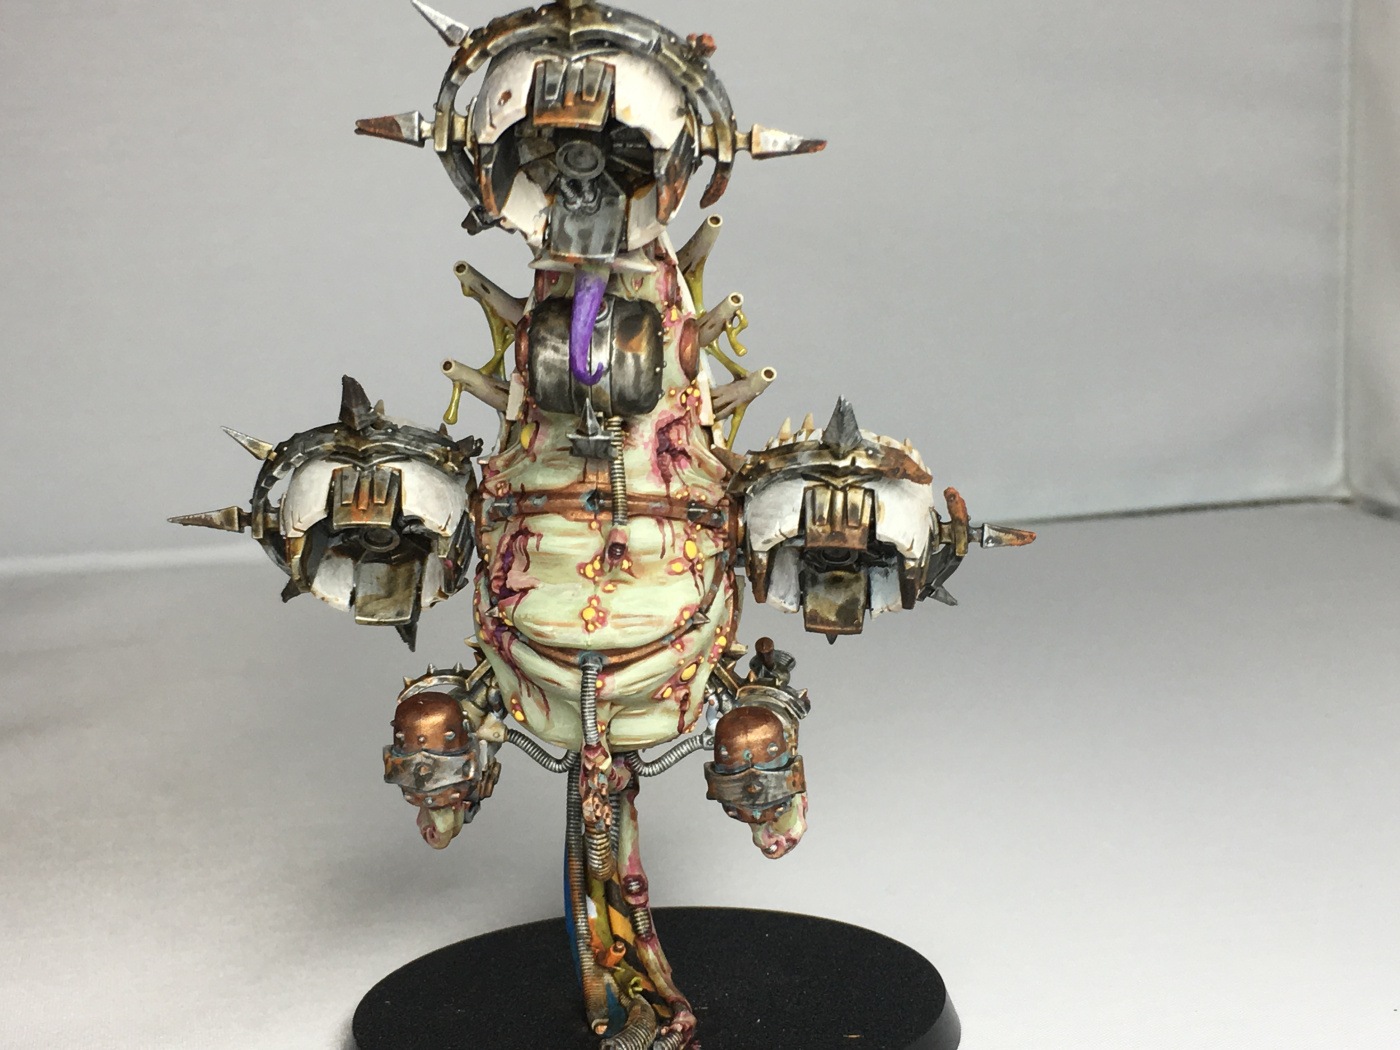
I mixed White, Averland Sunset and some Yriel Yellow and watered it down slightly, then painted the tops of all the spots and boils with it. The Light Green section of the Plague Spitter I highlighted using Light Green and increasing amounts of White.


I continued adding lighter shades to Light green sections. On the purple tentacle at the rear of the drone, and on the two front tentacles, I blended the Xereus Purple with the Nurgling Green by just increasing the amount of Nurgling Green and adding a few small layers close together, giving the effect that the skin changes colour over a short piece of the tentacle.
On this part I returned to Carroburg Crimson, and added trickles of it from the open wounds, burst spots and boils and the tears in the flesh.


The last major thing to add to the model was the trickles of corrosion shown in the Death Guard Corrosion video here. On this occasion I just used Agrax Earthshade and Seraphim Sepia. The reason I didn’t use the Black Shade was because I thought that, as the model is very detailed and ‘busy’, it might distract from the rest of it. Turns out it looks fine without the Black Shade.


Once this was done, I had to remove the Bloat Drone from it’d base – I shouldn’t have glued it down originally, but you live and learn. Using a pair of snips and a very sharp craft knife, I cut the drone from the standard base. BE CAREFUL!! I sliced through the length of m fingernail last week being careless, so take your time, and if your craft blade is blunt, put a new one in before trying to cut it off.
Once glued onto the new base I added two trails from the dangling tubes, one of Citadel Blood for the Blood God, and one of Nurgle’s Rot. I also dabbed spots of blood onto the base beneath the Drone, and added some to the spike on it’s nose, and the two metal tips on the tentacles at it’s front.
And that’s it!
Thanks for reading, and I hope you’ve enjoyed the posts.
If you have any thoughts please comment below, and please follow us on our other social media listed below:
Facebook / Instagram / Twitter / Youtube


0 thoughts on “How to: Paint a Death Guard Bloat Drone Part 2”