

How to: Paint Stormcast Eternal Sequitors, Part 2
If you’ve not come across it yet, part 1 of the guide can be found here.
The final part of the Sequitor posts will get the miniatures finished and looking great for the table top.
Bases
The bases were painted almost identically to the Shadespire Stormcast that I painted here. With the easy to build bases already being detailed, it means that they look superb before you’re even added paint too them. With paint, they look even better.
I used Rakarth Flesh as the base to the stone. I was originally thinking about painting the slabs as grey stone, but I don’t think that the colours of the model and the rest of the base would have looked as nice together. The Rakarth Flesh and subsequent layers I left more dulled and muted than the robes, so that they didn’t all blend in together, then the additional washes for weathering ensured that there was a noticeable difference.
After the basecoat and shade (from part 1), I reapplied Rakarth Flesh, then added two subsequent layers of Rakarth Flesh mixed with a spot of white – the second mix lighter than the first. This was then topped off with a light highlight of pure white. To weather the stone, I used Citadel Athonian Camoshade where the soil joins the stone, and also around the bottom edge of the stone where the raised parts were. Citadel Biel-Tan Green was added to the deeper recesses, and areas where dampness would be prevalent.
The soil was painted with Vallejo Flat Earth and shaded with Agrax Earthshade in part 1, and I now lightly highlighted it with another layer of Flat Earth, leaving the Agrax Earthshade in the recesses. Athonian Camoshade and Biel-Tan Green was added around the joins with the stone.
The leaves were painted initially with Vallejo Russian Uniform, German Cam Bright Green (GCBG) or a Flat Earth/Citadel Fire Dragon Bright mix. On the GCBG leaves, I added Russian Uniform to the edges of a couple as though they were in the early stages of rotting away, while leaving a few as plain GCBG as though they were freshly fallen. The Russian Uniform leaves were edged with a little of the Flat Earth/Fire Dragon Bright mix, and then they were washed with Agrax Earthshade or Biel-Tan Green to add some variety in the colours.


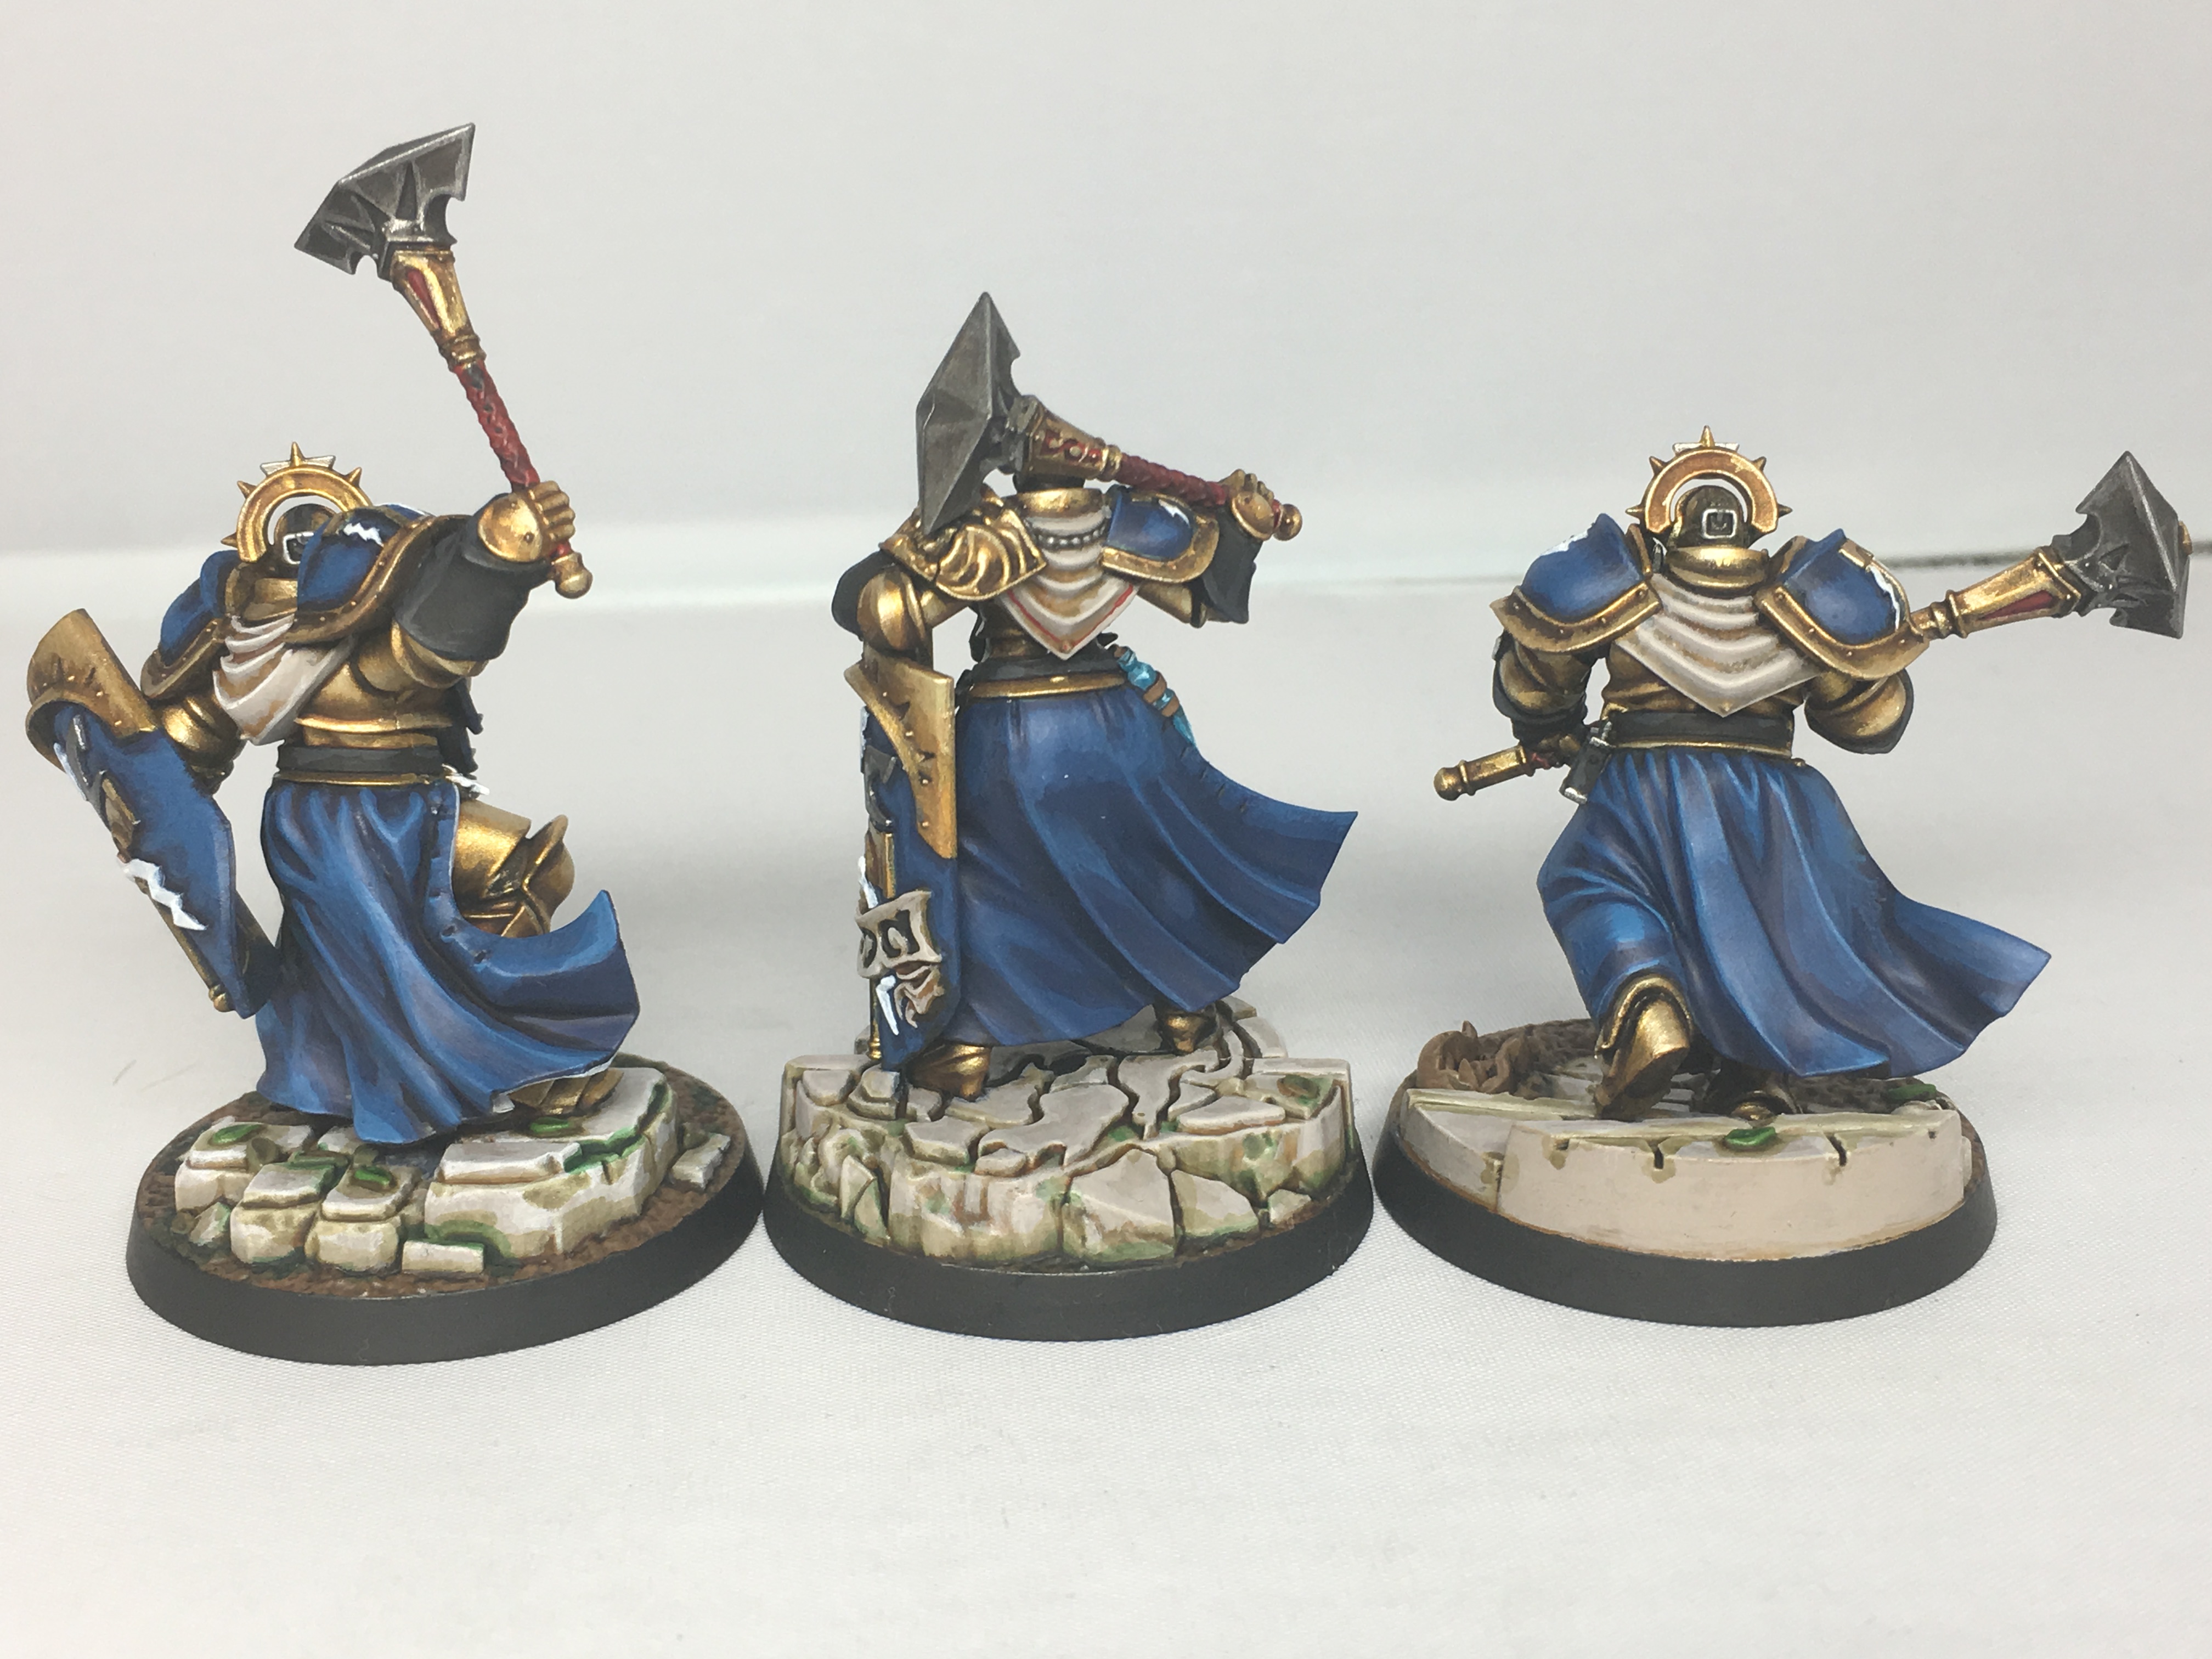
Shields
The shields were easy to do once the gold is out of the way. The lightning bolts were painted with pure white, and the shield has already been painted with Kantor Blue and shaded with Drakenhof Nightshade. The Anvil is Citadel Leadbelcher with a Nuln Oil shade. In the images below, the shield would be at about a 45 degree angle rotated anti-clockwise, which is why the blue highlights are on the right hand side.
Once the main shield was re-highlighted with Kantor Blue, it was just a case of adding a spot of blue and highlighting – leaving the previous colours showing around it’s edges, then adding another spot of blue and highlighting. Once the blues were finished, I used pure White to keep painting the lightning bolts until they were streak free.


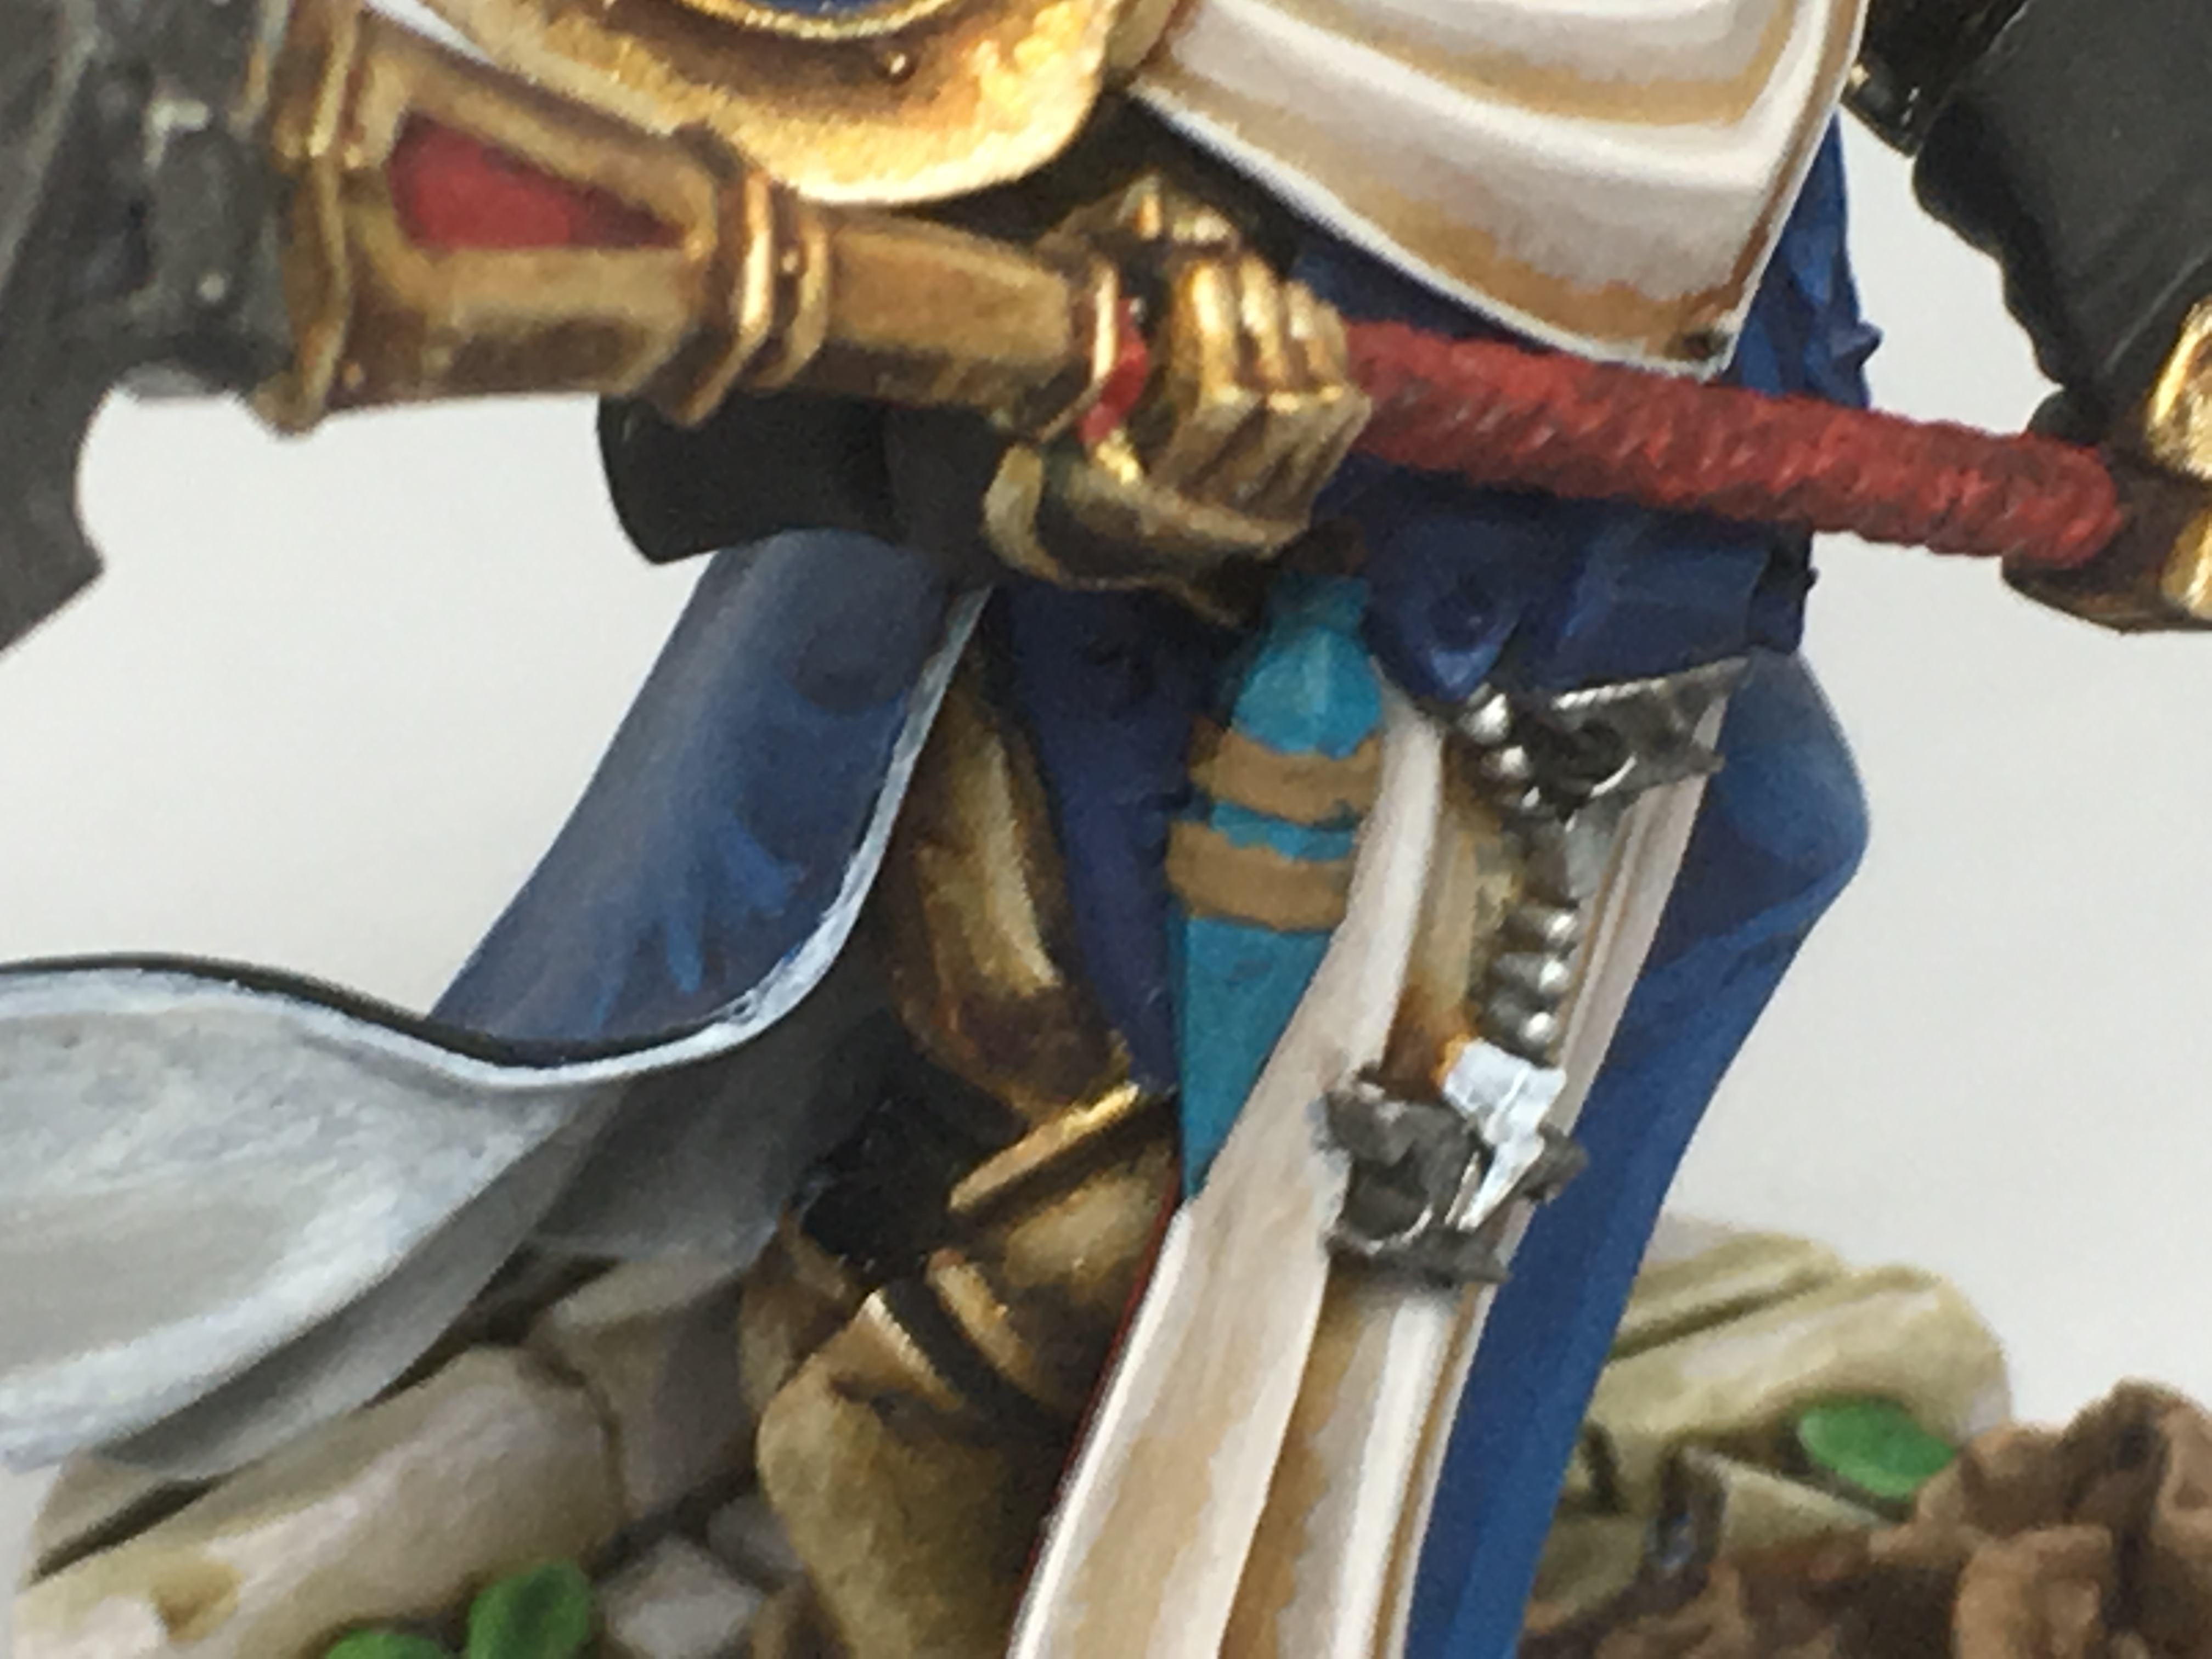
Angular Bottle
The bottles on the Stormcast miniatures are shown in the colours below, but as they’re your miniatures, you can paint them however you like. I’ve done a couple of posts on different bottles and techniques, so if you want to have a look, you’ll find a video on how to paint bottles here, and a post about how to paint bottles here.
If you’re looking to get them as they are here, then follow the steps below. First paint the bottle with Citadel Ahriman Blue. Then add a little white to the Ahriman Blue, and paint all the angles of the bottle, and a really tiny bit around the angles. At the very bottom of the bottle, make sure the mix goes about the quarter of the way up that section as in picture 2. Add a little more white and repeat the process twice more, each time leaving a portion of the previous layer visible. Finally, do one highlight of pure White, mainly where the bottle’s angles meet s in picture 5.


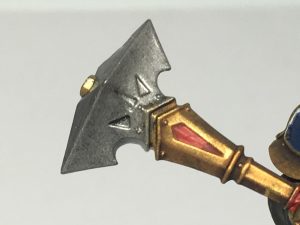
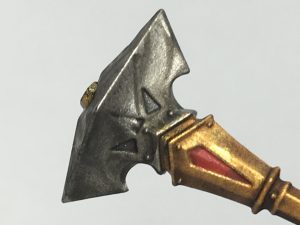
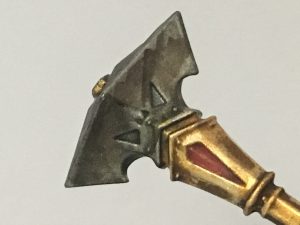
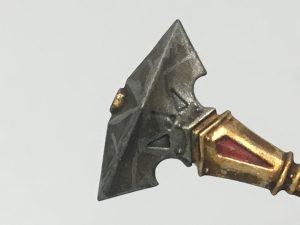
Maul
The maul is pretty easy to paint up. Base coated in Leadbelcher, it was thenwashed with Nuln Oil, then, once dry, the concave sides were washed with Agrax Earthshade. It was then re-coloured using Leadbelcher, and edge-highlighted with Vallejo Model Air Steel.

Vambraces
The vambraces (the wrist guards) were probably the easiest part of the miniature to paint, with a Black basecoat, and highlights of Vallejo German Grey on the creases.


The shaft of the weapons and the red sections near the maul head were painted with Mephiston Red, then washed with Citadel Druchii Violet. You could easily reapply the Mephiston Red and highlight with a Mephiston Red/Fire Dragon Bright mix, but as these are for the tabletop, I stopped short of that. If this is something you’d like to see, let me know and I’ll paint one of them up to get some pictures here.
The only thing left to do is paint the sides of the bases to cover everything that may have been missed with the black undercoat and add the lightning bolt to the pauldrons. Once they’re done, the Sequitors are complete.


If you have any thoughts please comment below, and please consider following us on other social media listed below:


do you by any chance have a video of you painting the shield? The lightning bolts are driving me crazy getting the edges clean like that!
Hey there! There is a Sequitor video on our Youtube channel that covers the shield, I’ve linked it here. 🙂
How to paint a Stormcast Eternals Sequitor. 🙂